Friday 9 August 2013

Finally floored.

The last few days have been incredibly hectic. So much so that I've made a lot of progress since Tuesday. Finished the floor in the first room. Installed three doors: a bifold at the electrical panel, and two others.

Found baseboards and casing at the Home Reusables store, and put those on as well, using my nifty new air nailer. I even got the window trimmed out with some other stuff I found at Home Depot. (Moulding six expensive, and there is a LOT of it in a house. At a buck or so per linear foot, the small bedroom alone cost over $100, with half of that being purchased at a discount reclaimed products store.)

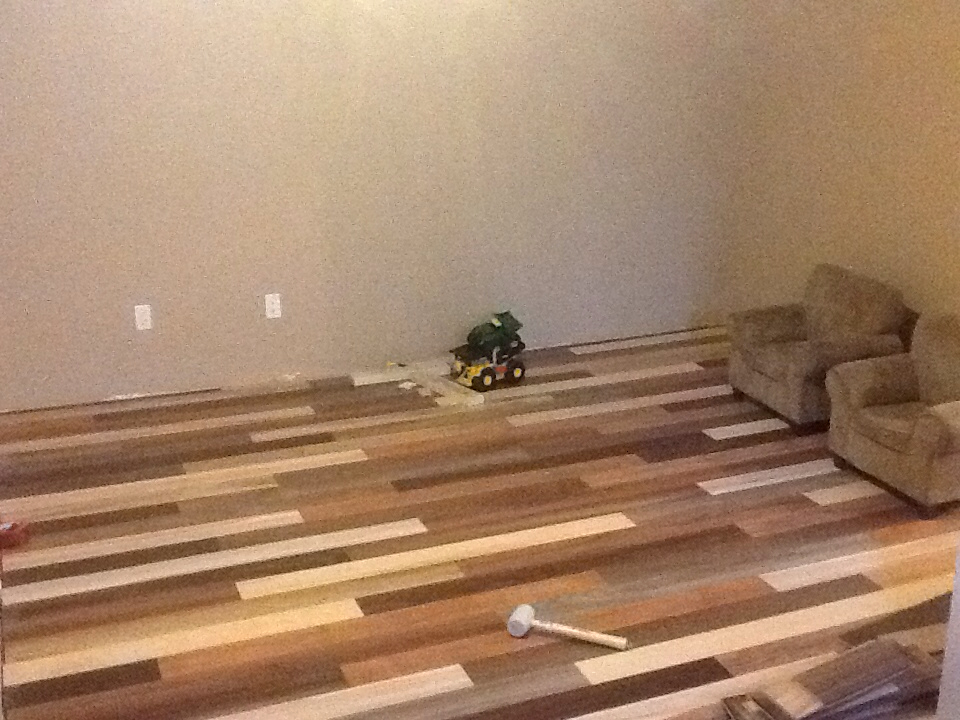
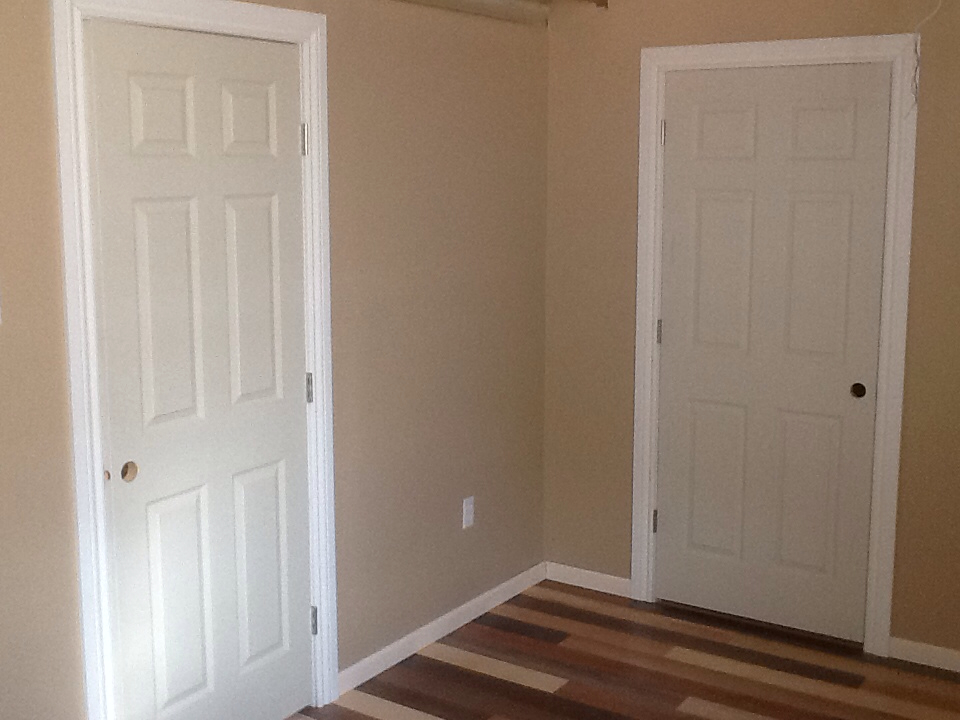
View of the finished first room: just need doorknobs and a ceiling.

I like the way the flooring turned out in the room. It has character.

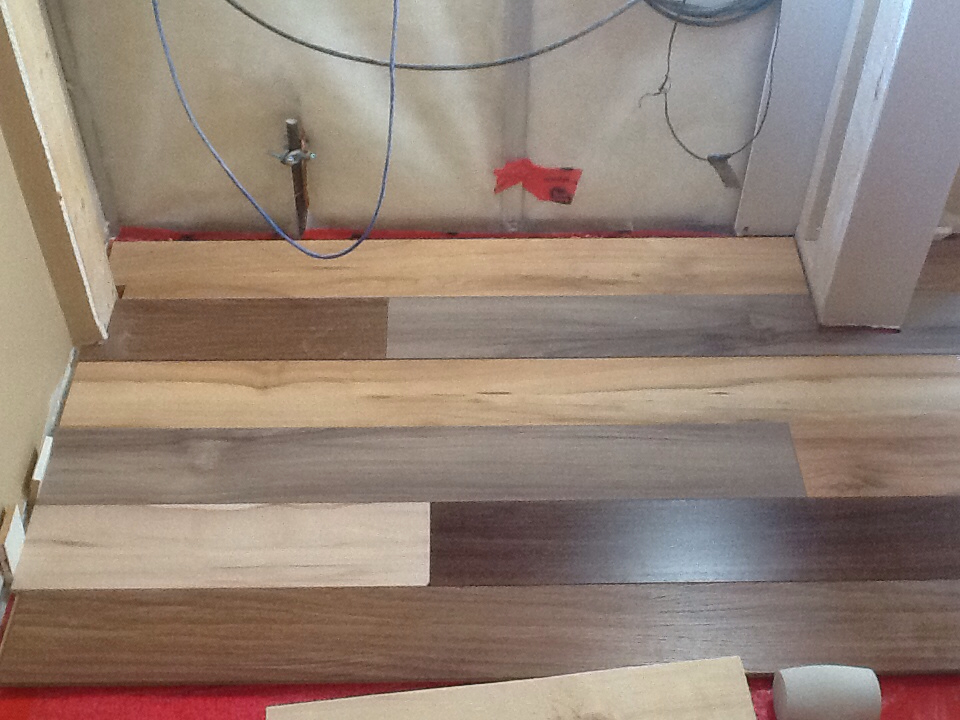
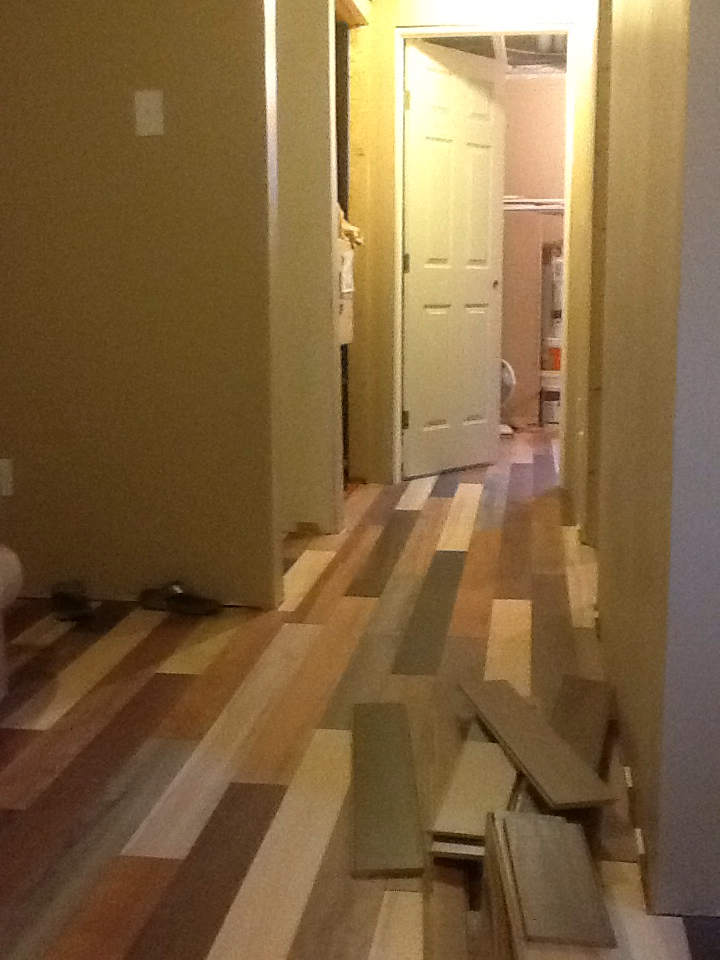
On to the hallway, which was a fantastic challenge. The planks needed to be pounded in lengthwise, and pressure put on the end as it slipped under the previous plank. Definitely a two person job. How relieved was I when I continued the floor over past the hallway to the living area and did a rough fit to see if it would line up... And it worked. Phew!

Finally, today, I pushed through and completed the rest of the floor. It took about 8 hours nonstop, but its done:

Next steps before the family gets here for a visit: throw a couple of doors on the utility room and storage closet, and buy doorknobs for at least a partially finished look.


Tuesday 6 August 2013

Lessons learned of Laminate

Well, I has originally hoped to be done the flooring by the end of yesterday... Obviously that was a somewhat unrealistic goal. Although laminate flooring gets laid down quickly, when you don't REALLY know what you are doing, there is a lot of figuring out that has to happen. And of course, there are always stumbling blocks along the way.

Underlay: went out Saturday to get some blue stuff with little dimples on it that I saw at Rona a few weeks ago, and of course they didn't have it. Checked for other material at a variety of other stores, and wasn't satisfied with any of it. Lesson learned: do your research before going to 15 stores trying to figure out what you want.

This is what I ended up with. It has little styrofoam balls stuck to the bottom, and acts as a vapour barrier as well. I bought four rolls, and once I rolled out the first roll I quickly realized that that would not nearly be enough. Lesson learned: calculate how much you need before buying it.

Putting down the first row was tough, and tricky. First, it was deciding which direction the planks would run. (We decided lengthwise down the hall) Next, it was deciding where to start. (Electrical closet) Then, it was ripping the tongue off the first row, as the tongue edge goes against the wall. Not soon enough, I realized the first problem: what do do next to the door jamb. Simple solution: cut a u-shape to fit!

As it turns out, that was not so simple. How to cut it... With a jigsaw, of course. Which I don't actually have, for some reason. Well, then a keyhole saw should work. Which I also don't have. How about a rotary tool? Burned out a bit (it was a drywall bit, whoops) and the wood bit wasn't sharp enough. Plus, it's really hard to keep a straight line with a rotary tool. Lesson learned: use the proper tools: not only is it easier, it does a better job. Off to the store again (for the third time in the same day) to purchase a jigsaw.

Speaking of proper tools, I have to give a shout out to Trevor here: I had originally intended to use a chop saw for most of my board cuts, but he loaned me a table saw and cross-cut jig. He was right. Turns out, I am finding that I need to rip several lengths of board (imagine trying to do that with a chop saw, or hand saw?)

And finally, here are the results of about an hour of actual work, once I got going.

A couple of hours' work after the kids went to bed got me to the doorway, and more figuring out using brain power at the end of the day just wasn't happening, so I called it quits.


Friday 2 August 2013

At Transformation

Not just a title of a great 'Hip song. It's truly amazing how much a coat of paint can transform a room.

A few notes so far: drywalling window casings is a bad idea. The windows closed abruptly and gouged the drywall. Thus, I will be installing a veneer or some kind. Metal or vinyl if I can find it.

On another note, drywalling is a pain. Mostly because I don't really know how to do it, I just make it up as I go along. I've learned that you need to put more mud down than you think before you lay the tape. Else wise, it creates an air bubble that no matter how many other coats you out on afterwards, it remains a weak spot in the wall. Eventually, you'll just give up and cut it out, re-mud (and sometimes re-tape), sand, mud, sand again.
They also say that "less is more" when it comes to mud, and now I know what they mean. The more mud you put on, the more you have to sand off later.
 

Anyhow, progress update: drywall finished to satisfaction, primed, and first coat of paint is on. Next steps: second coat of paint and any touch ups necessary, followed by lining the floors with subfloor or underlay, and the laminate. Here's hoping it gets to that point by the end of the long weekend!


Thursday 25 July 2013

Video editing apps for iPad


Using Blogsy today.


Ok, so I know that video editing isn't exactly one of my projects this summer, but I came up with an idea for a little project using the iPads. For the trees and forests unit, students will need to find, observe, and describe 3-5 facts about a local tree using the video camera app on the ipad.

Looking for a decent, FREE video editing app, however, is difficult. Most of the free apps out there either have:

  • Length restrictions
  • Ads
  • Limited functionality

Started using VideEditorFree, which was recommended via a variety of Ed tech sources. No good - doesn't have the ability to add titles or transitions, nor can you trim clips. Tried several more for both ipad and iPhone, with mixed success. Magisto (free) worked alright - had most of the features I wanted, and was able to export to my camera roll. Someone suggested Vimeo, which is my favourite so far. (Also free)


(Side note: favourite autocorrected to the Canadian spelling)


With Vimeo I was able to quickly and easily add, reorganize, and trim clips, and add a still photo. To that I added a title and adjusted transitions. After proofing, the entire process took about 10 minutes for a 1 minute video. Assuming that students don't work as fast as I do (after trialling 15 apps) they should be able to create a 30-60 second video, with filming, in an hour.


Uploaded to my YouTube account using YouTube Capture (free) took about 3 min. FYI: YouTube capture also supports synchronous uploads to Facebook, google+, twitter.

I wonder if I can attach it here too... Nope. Although Blogsy has all the buttons on the right, you need to have an account with each of them to be able to use that button. So, in theory, I should be able to access any of my accounts and attach the video...

Hey look, it worked once I logged into YouTube via Blogsy :) although I could have just added it right from the camera roll, good to know that I have some options.

Thursday 11 July 2013

Testing Blogsy

Paid the $5 to test the Blogsy app with my blogger account through google. The advantage to using Blogsy is that our students receive google accounts anyway, and Blogsy would enable them to richer the content of their blogger account, as it appears so far that the blogger app is somewhat limited.

However, in my browsing of the App Store, I discovered that Kidblogs has an app itself, and its FREE! Perfect for educational institutions on a budget. That will be my next project to look into this summer. For now, I will continue to blog the basement renovation and our upcoming vacation.

Note: Blogsy saves drafts and you have to manually publish after by changing the settings in the top left gear icon. Also, each individual ipad would be set up with a specific student's blog. Which would be open and accessible for other students who use the ipad to... "Update" :)

Sore arms...

Day five of drywalling. It's done, but still working on the mudding and sanding. I once (or twice) said that this was the only job I would pay someone to do, because I find it the most tedious, time consuming, and frustrating job of all renovations. 

Taping went fine, but one thing that we needed to spend a little more focus on was getting all the air bubbles out when we embedded the tape. After two coats, there are still several areas with bubbles. Bah!

Frustration and boredom set in when you're putting on a third coat of drywall mud, and its easy to run out of steam. Especially when there are a few areas that take longer to dry than others. One thing that I  didn't think of was that closet. With little or no air circulation in there, after two days the corners were still damp, and that of course throws off the timeline. It would have been nice to do each step of the reno sequentially, but with the closet off drying time by an entire day, parts of the basement are drying their third coat as I write this, and the closet is still needing the third coat. Oh, and I'm out of mud.
Therefore, I'm out of time and patience and taking a vacation. Back to the renos in August.

Tuesday 9 July 2013

Let's get muddy!

Basement Reno, project 2: Tuesday, and drywalling is 90% complete. I just have to finish the ceiling in the stairwell, and that's going to be a nightmare. 
The duct has been boxed in and drywalled:
It will look much better when the ceiling is installed.

I framed out a closet in room 1, big enough for a walk in, and wide enough for the larger Rubbermaid containers to fit width wise, so that will be a storage area for us, but the next owner could install some shelves if they wanted to.


The dreaded electrical panel... What to do with that? I decided that I couldn't leave it bare ( code says you have to protect the lumex wife somehow ) and because there is a ground rod on the floor, I should just enclose it behind a bifold door or something. So, I framed that out for a 36" bifold. We'll see how that turns out.
Also, ceilings are a pain to drywall, and they are even worse to mud and tape. 
Speaking of which, that is going well. First coat and tape is almost completed. Finish that tomorrow and start sanding what we've completed thus far.

And finally, Habitat for Humanity's ReStore had flooring on sale this week, so we went and picked out flooring. 32 boxes of laminate for $217. We're going to try the multicoloured floor like Ellen has on her dance floor: